Showing posts with label tutorial. Show all posts

Wednesday, June 9, 2010

PRETTY TILE COASTERS

So a while ago I saw a ton of decoupage tile coasters at a local craft fair and put it on my list of things to try. I haven't had the best of luck with decoupage in the past, and my biggest concern was the durability. I didn't want to make them as a gift and them look bad after a short while. I did some googling and found a few tutorials that showed stamping on ceramic tiles which I liked. But they called for a curing process involving baking them in the oven and coating them with polyurethane. TOO complicated it seemed and still not a guaranteed durable result. So... Last December, as I was stamping a different project with my favorite ink - STAZON - it came to me. I'm sure it is not an original idea, but here's what I did


I will start with a quick product recommendation.
If you've never used STAZON ink before, you must try it!!

It works on anything, drys super quick and will never swear after the fact.
STAZON ink pads are to stamping what Sharpies are to doodling.
(I love me some sharpies too!)

Anyway, it got me thinking about the coasters. So I ran down to Home Depot and bought some cheap tumbled tiles and threw together a cute gift.
To make this project, you will need the following:
*tumbled tiles ((6 for $4.95))
*stazon ink of your choice (($8/pad...I always use a coupon and get them 1/2 off))
*felt pads or substitute for feet (($4/package))
*various stamps of your liking
((assuming you have some- or alot like me, but if not you can run out and get one out of the $1 bin at Michael's if needed))


All I did was wash off the tiles (they can be a bit dusty) and stamp them with some fun stamps and STAZON ink. I let them rest to ensure they were good and dry (about 10min to be extra safe) and then I rinsed them again and dried them. Afterwards I put on some little felt feet so they didn't scratch the table. You could also use a felt square, but I had stamped on the back as well. I made a set of 6 for my brother-in-law as a housewarming present. (I wish I had taken pictures, but didn't think about it. They were a scientific butterfly (so they looked more manly) repeated in a scattered pattern.) And I made these two for myself. This is how I packaged the set of six and I thought they looked nice (more impressive with a bigger stack of course)

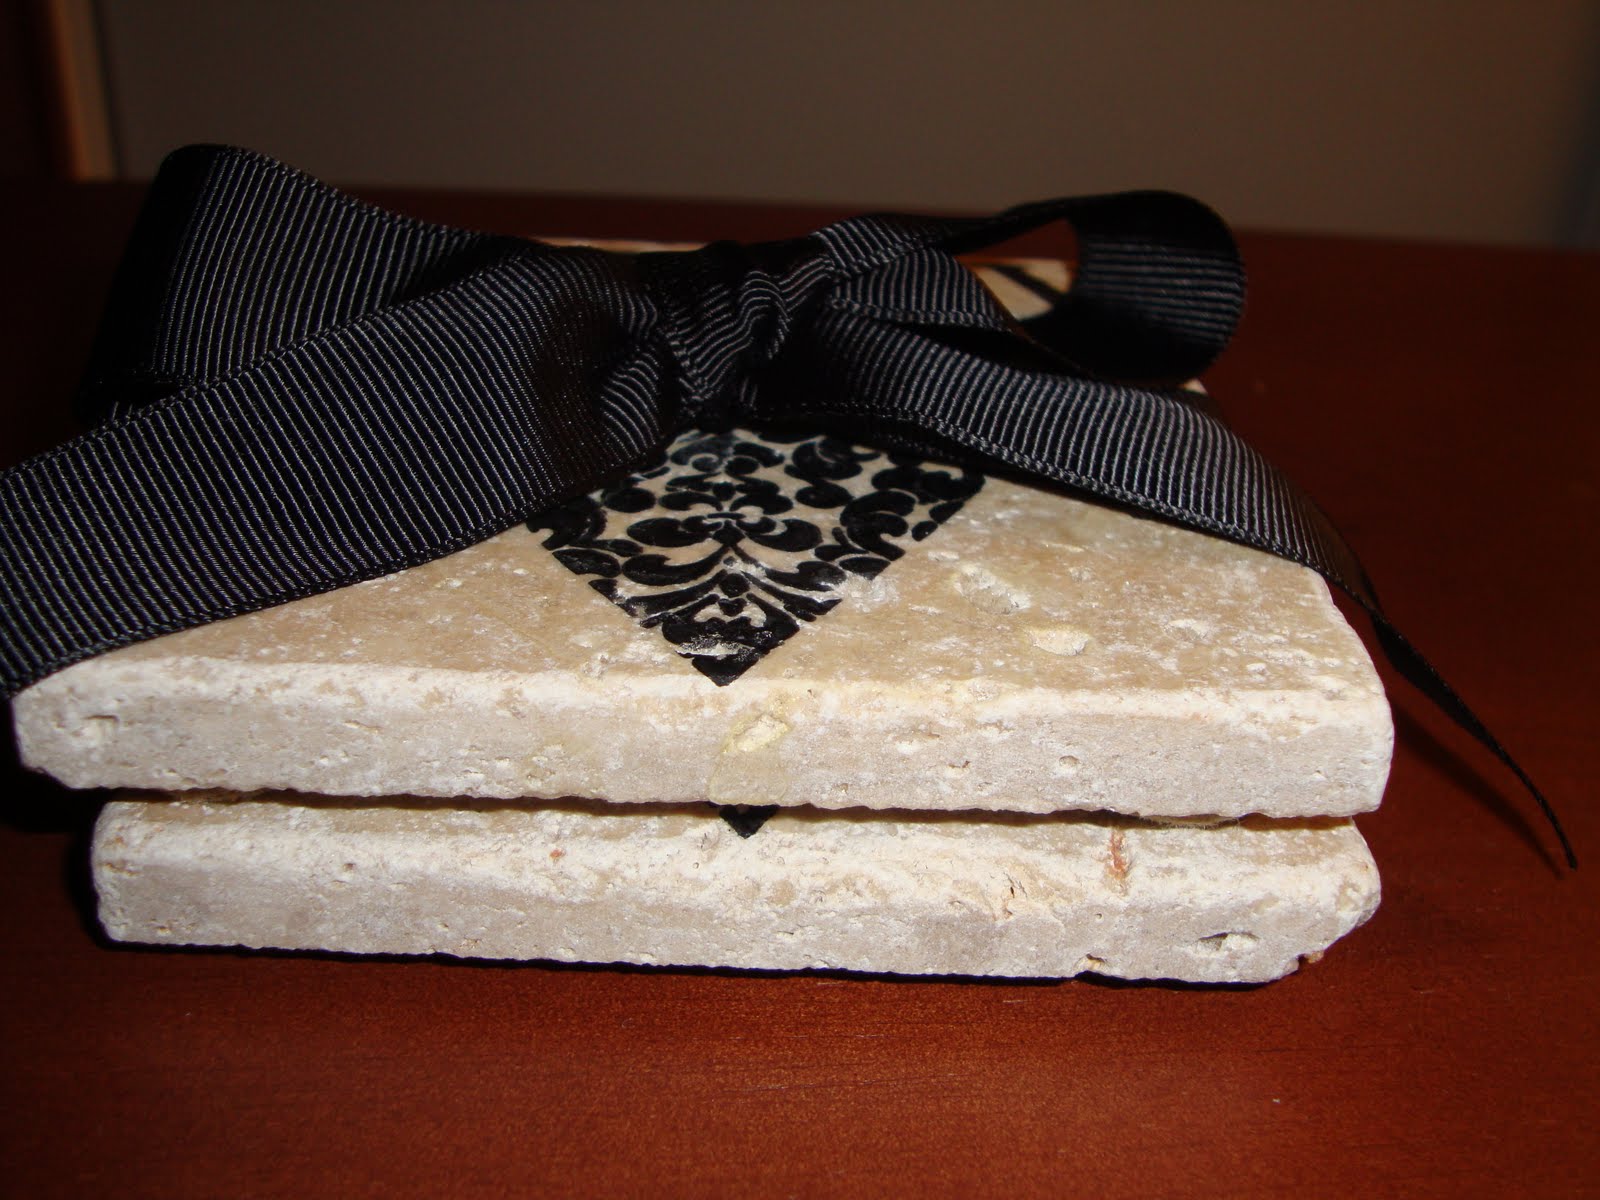
This is a great project for just about anybody. The possibilities are endless as you can use ANY stamp you own or can get your crafty hands on. You can make them as customized as you like. I have even thought about adding names on them. Not only housewarming gifts, but weddings, birthdays, teacher gifts, mother's day, father's day,Christmas, you name it. I think they would be really easy to make and have on hand. You can also add them easily into a gift basket. ADDED BONUS...they are super cheap to make (less than $1 a tile).


Now don't get me wrong, I still LOVE the way the decoupage coasters look and think I may try them just for me some day, then if they don't hold up only I will know.
I hope you enjoyed my rambling and decide to make some coasters of your own.
Until next time, Have FUN!
~Barbara

Tuesday, May 4, 2010

FLOWER PENS IN A BUCKET


So I recently made a bucket full of flower pens for part of my mother-in-laws birthday gift. She is a teacher and this is a great teacher gift, or for anyone who has a desk that they can put goofy things on. I have seen them at a Vet's office counter to keep people from taking the pens. I made one for our wedding with a gardenia and a rose to use at the guest sign in table. As you can see, there are many ways this could be a useful gift.

This is a super easy project (and inexpensive - I did the whole thing in 30 minutes and I had most of the supplies already. if I had nothing I still would of only spent a whopping $12)

You will need the following:
*various fake flowers of your choice (($6 for 12))
*ink pens (($2))
*floral tape (($1))
*bucket, vase or other container to hold the pens (($1))
*deco stones or beans - to hold the pens so they will stand & arrange easy (($2))
*hot glue/gun (optional)

I know you probably don't need the step by step, but in an effort to get in the routine of detailed tutorial instuctions, here goes...


ONE:


TWO:


THREE:


Now you have a cute place to put your flower pens!

In order to make the pens, you will clip the flowers from their stems leaving as much or little stem as you like that will be taped to the pen with floral tape. I prefer to leave an inch or two so that is is stable. If you want the flower to extend longer you will need more stem to tape to the pen. With some of the flowers, you can use strong scissors, but the better ones will require floral cutters or wire cutters.

Once the flowers are clipped, I prefer to use hot glue to make sure the flower will not fall off of the small piece of stem that will be taped to the pen. This is optional, but makes for a more sturdy gift.

If you have never used floral tape before it is super easy use. It has a bit of sticky that makes it stick to itself. I begin wrapping at the top of the pen and tightly work my way down to the tip of the pen. There is really no wrong way to do this. If you dont like the way it looks, unwrap it and start again. But consider no one will be inspecting your wrapping job.


All done... now all you have to do is arrange your masterpeice.


Get creative and make it your own, I even made some with pretty feathers.


Enjoy!
~Barbara